 Pin it
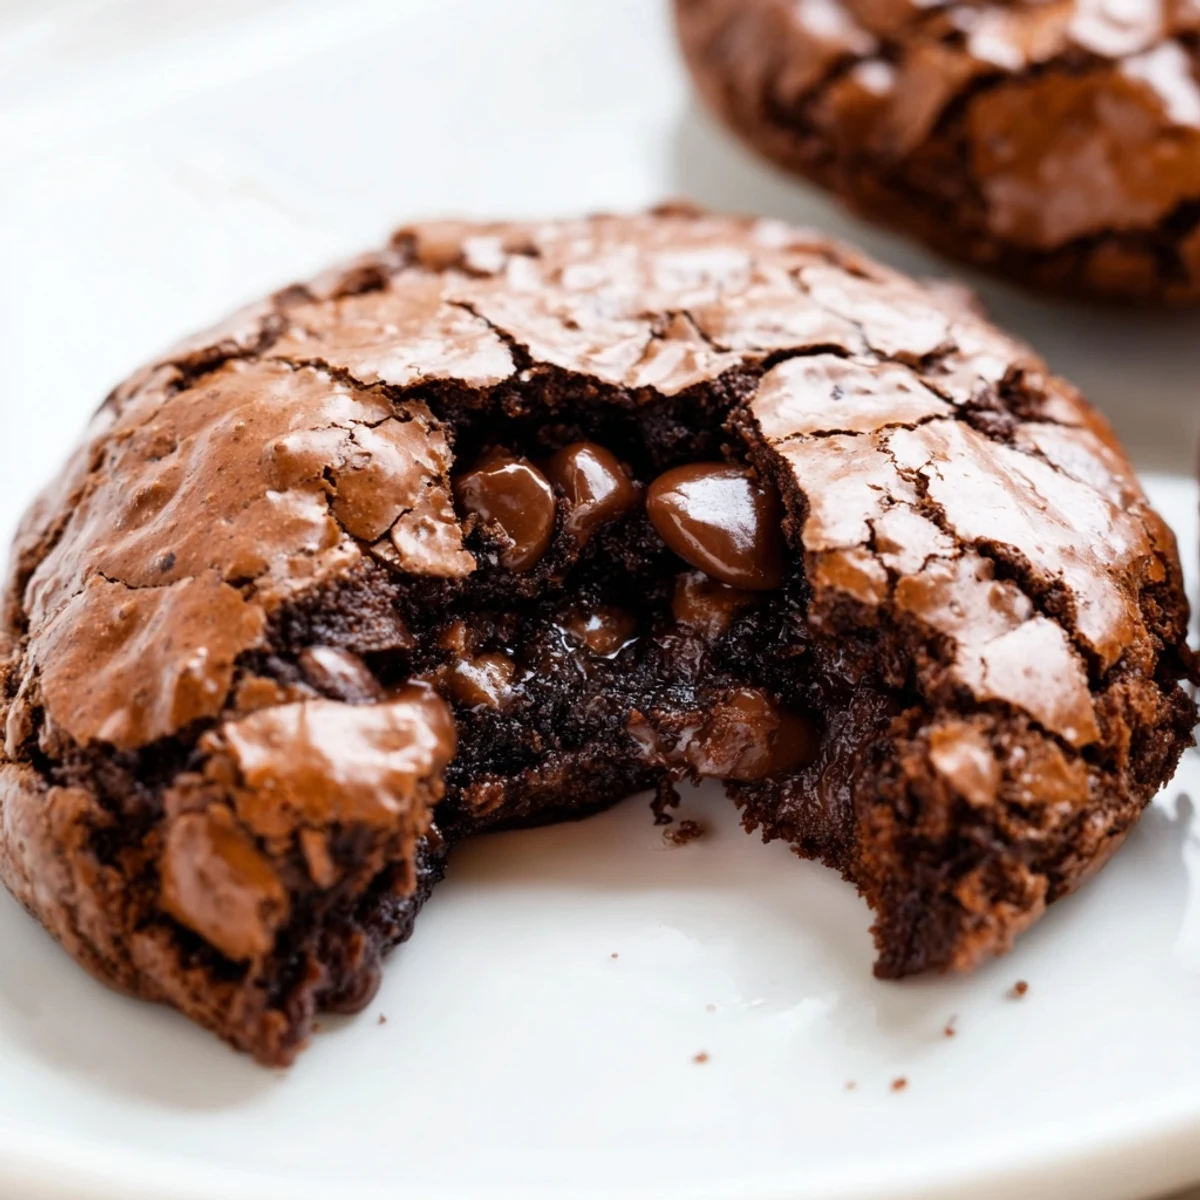
 These fudgy brownie cookies combine the best of both worlds—rich, chocolatey brownie cookie dough wrapped around a creamy eggless cookie dough center. The result is an irresistible treat with a crackly exterior and gooey chocolate filling.
The brownie dough uses melted dark chocolate and cocoa powder for intense fudginess, while the edible cookie dough filling stays soft and creamy thanks to heat-treated flour. Each cookie bakes in just 12 minutes for crisp edges and molten centers.
Perfect for chocolate lovers, these oversized treats are best served slightly warm when the cookie dough center is at its creamiest. Store in an airtight container for up to 4 days—though they rarely last that long!
The smell of melting dark chocolate hit me first, then the realization that I'd forgotten to buy chocolate chips for regular cookies. Rather than scrap the baking entirely, I decided to embrace the chaos and stuff brownie batter with homemade cookie dough instead. My roommate walked in mid-experiment, raising an eyebrow at the dough balls in the freezer, but one bite of the finished product had her hovering by the cooling rack for the rest of the evening.
I brought these to a potluck last spring, specifically because I knew the birthday girl couldn't decide between brownies and cookies. She reached for one, paused, then took two more before even leaving the dessert table. Later that night I got a text asking for the recipe, written entirely in capital letters with about fifteen exclamation points.
Ingredients
- Unsalted butter: Keep it at room temperature for the filling but melted and warm for the brownie portion to help emulsify the chocolate
- Dark chocolate: The 70% cocoa intensity cuts through the sweet cookie dough center, creating that sophisticated contrast
- Heat-treated flour: Microwaving the flour for one minute, stirred halfway, makes the dough center completely safe to eat raw
- Both sugars: Using granulated and brown sugar together gives chewy edges while keeping the center tender
- Eggs: Room temperature eggs will blend more smoothly into the chocolate mixture without seizing
- Mini chocolate chips: Their small size distributes evenly through the dough without creating huge pockets of melted chocolate
- Cocoa powder: Unsweetened cocoa deepens the chocolate flavor without adding extra sweetness
- Baking powder: Just enough to lift the edges while keeping centers dense and fudgy
Instructions
- Make the dough centers first:
- Whip the softened butter and brown sugar until they're pale and fluffy, then stir in milk and vanilla until creamy. Fold in your heat-treated flour and pinch of salt, then gently mix in those mini chocolate chips until they're evenly distributed. Scoop twelve small balls, each about two teaspoons, onto a parchment-lined plate and park them in the freezer while you work on the brownie dough.
- Melt chocolate and butter together:
- Either use the microwave in thirty-second bursts, stirring between each round, or set up a double boiler on the stove. Keep stirring until the mixture is glossy and smooth, then let it cool slightly so it doesn't scramble your eggs when you combine everything.
- Whip the sugars and eggs:
- Beat the granulated sugar, brown sugar, and eggs together for a solid two minutes until the mixture turns pale and creamy. This step incorporates air that helps give the cookies their signature crackled tops.
- Combine wet and dry ingredients:
- Pour in your vanilla and that gorgeous melted chocolate mixture, folding until everything's well blended. In another bowl, whisk together flour, cocoa powder, baking powder, and salt, then add these dry ingredients to the wet mixture and mix until a thick, glossy dough forms.
- Chill the dough briefly:
- Let the brownie dough rest in the refrigerator for ten to fifteen minutes, which makes it much easier to handle and helps prevent the cookies from spreading too thin in the oven.
- Get your oven ready:
- Preheat to 350°F (175°C) and line two baking sheets with parchment paper so you're not scrambling later.
- Stuff the cookies:
- Scoop about two tablespoons of brownie dough per cookie, flatten it in your palm, and tuck one chilled cookie dough ball in the center. Wrap the brownie dough around the filling, pinching the edges to seal it completely, then repeat until all twelve are ready.
- Bake until just set:
- Arrange the cookies on your prepared trays with enough space between them, then bake for ten to twelve minutes. You're looking for tops that are just set with those signature crackles—any longer and you'll lose the fudgy texture in the middle.
- Cool completely before serving:
- Let them rest on the hot baking sheet for ten minutes, which finishes setting the centers, then transfer to a wire rack until completely cool.
 Pin it
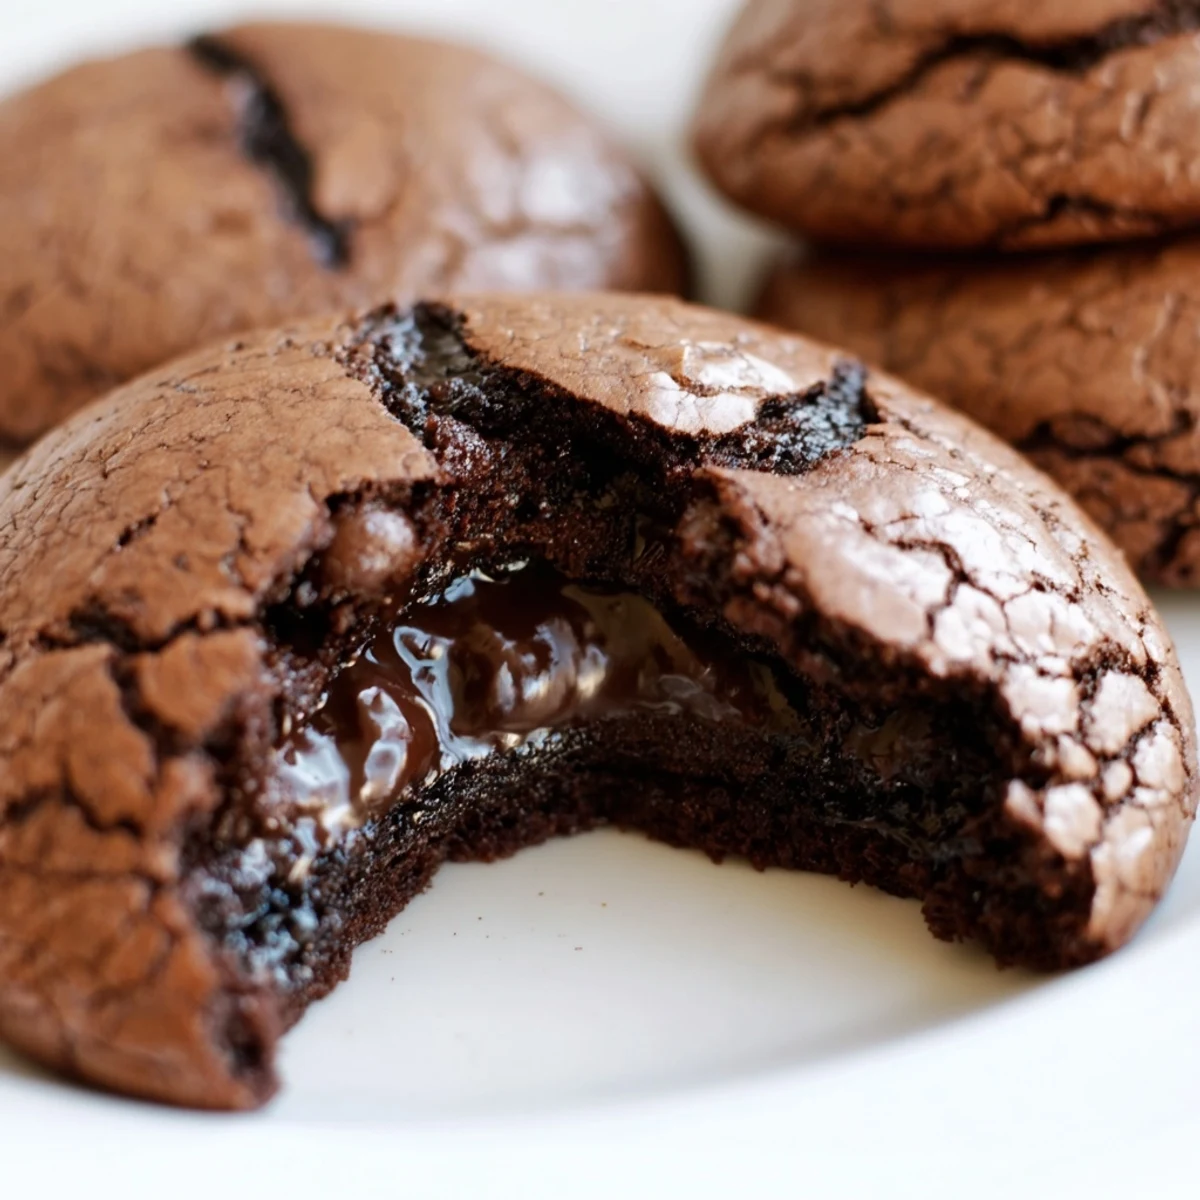
 My sister called me after making these, slightly panicked because she thought she'd underbaked them. I told her to trust the process and let them cool completely. She texted back an hour later saying they were the best things she'd ever made and already planning her next batch.
Making Them Ahead
You can freeze the assembled, unbaked cookies on a baking sheet until solid, then transfer them to a freezer bag for up to three months. Bake them straight from frozen, adding just two or three minutes to the baking time, and you'll have warm stuffed cookies whenever the craving hits.
Getting That Crackled Top
Those beautiful shiny crackles come from beating the eggs and sugars until they're properly aerated, then folding in the slightly cooled melted chocolate. Skipping the whipping step or adding chocolate that's too hot will give you a dull, flat surface instead of that bakery-style finish.
Customization Ideas
Swapping the mini chips for chopped nuts or crushed pretzels adds unexpected crunch to the dough center. You could also infuse the melted chocolate with espresso powder or orange zest for a grown-up twist that still delivers that nostalgic cookie dough comfort.
- Try using milk chocolate instead of dark for a sweeter, more nostalgic flavor profile
- Add a teaspoon of cinnamon to the brownie dough for subtle warmth that pairs beautifully with dark chocolate
- Roll the finished cookies in powdered sugar while they're still warm for a snow-capped presentation
 Pin it
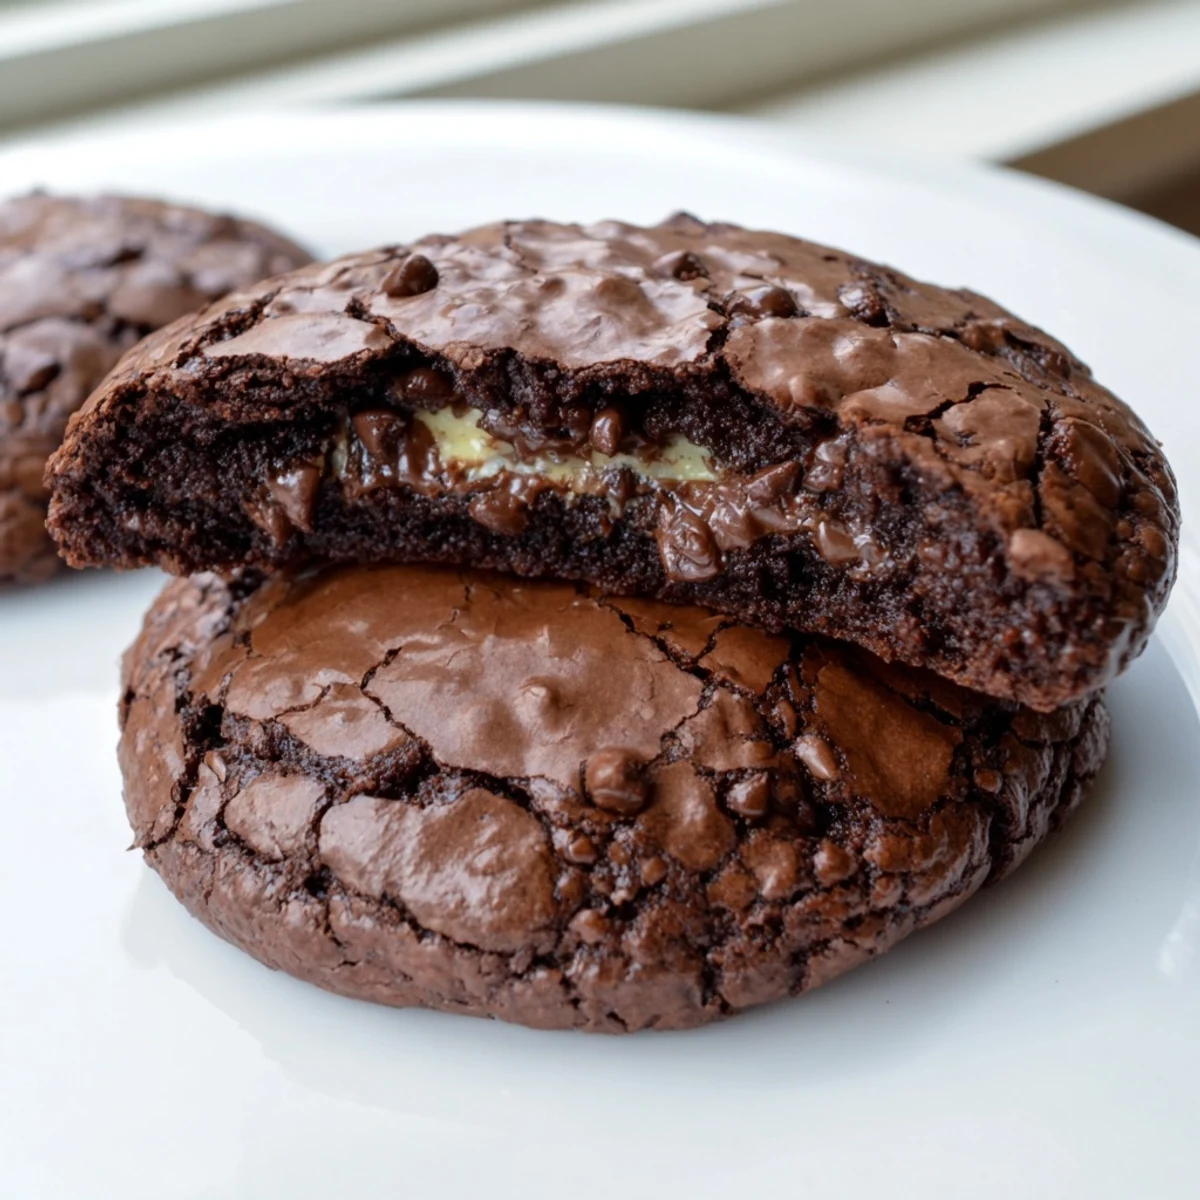
 These cookies have become my go-to whenever I need to turn a regular Tuesday into something worth celebrating. There's something deeply satisfying about biting through that crackled brownie exterior and hitting that creamy, nostalgic cookie dough center.
Recipe FAQs
- → Why do I need to heat-treat the flour?
-
Heat-treating flour makes it safe to eat raw by eliminating any potential bacteria. Simply microwave the flour for about 1 minute, stirring halfway through, before incorporating it into the cookie dough filling.
- → Can I use milk chocolate instead of dark chocolate?
-
Yes, you can substitute dark chocolate with semi-sweet or milk chocolate. However, dark chocolate (around 70%) provides a richer, more intense chocolate flavor that balances the sweetness of the cookie dough filling beautifully.
- → How do I know when the cookies are done baking?
-
The cookies are ready when the tops are just set with visible crackles, about 10-12 minutes. They should still look slightly soft in the center—this ensures a fudgy texture. Overbaking will result in a cakey rather than fudgy consistency.
- → Can I freeze the cookie dough balls?
-
Absolutely! You can freeze the prepared cookie dough balls (both the filling and the brownie dough) for up to 3 months. Bake them straight from frozen, adding 1-2 extra minutes to the baking time.
- → Why did my brownie cookies turn out cakey?
-
Cakey texture usually results from overbaking or overmixing the dough. Be sure to chill the brownie dough before shaping, and remove cookies from the oven when the tops are just set. Slightly underbaking ensures that desirable fudgy texture.
- → Can I make these smaller?
-
Yes, you can make smaller cookies using about 1 tablespoon of brownie dough and a smaller cookie dough ball (about 1 tsp). Reduce baking time to 8-10 minutes and adjust yield accordingly.