Pin it
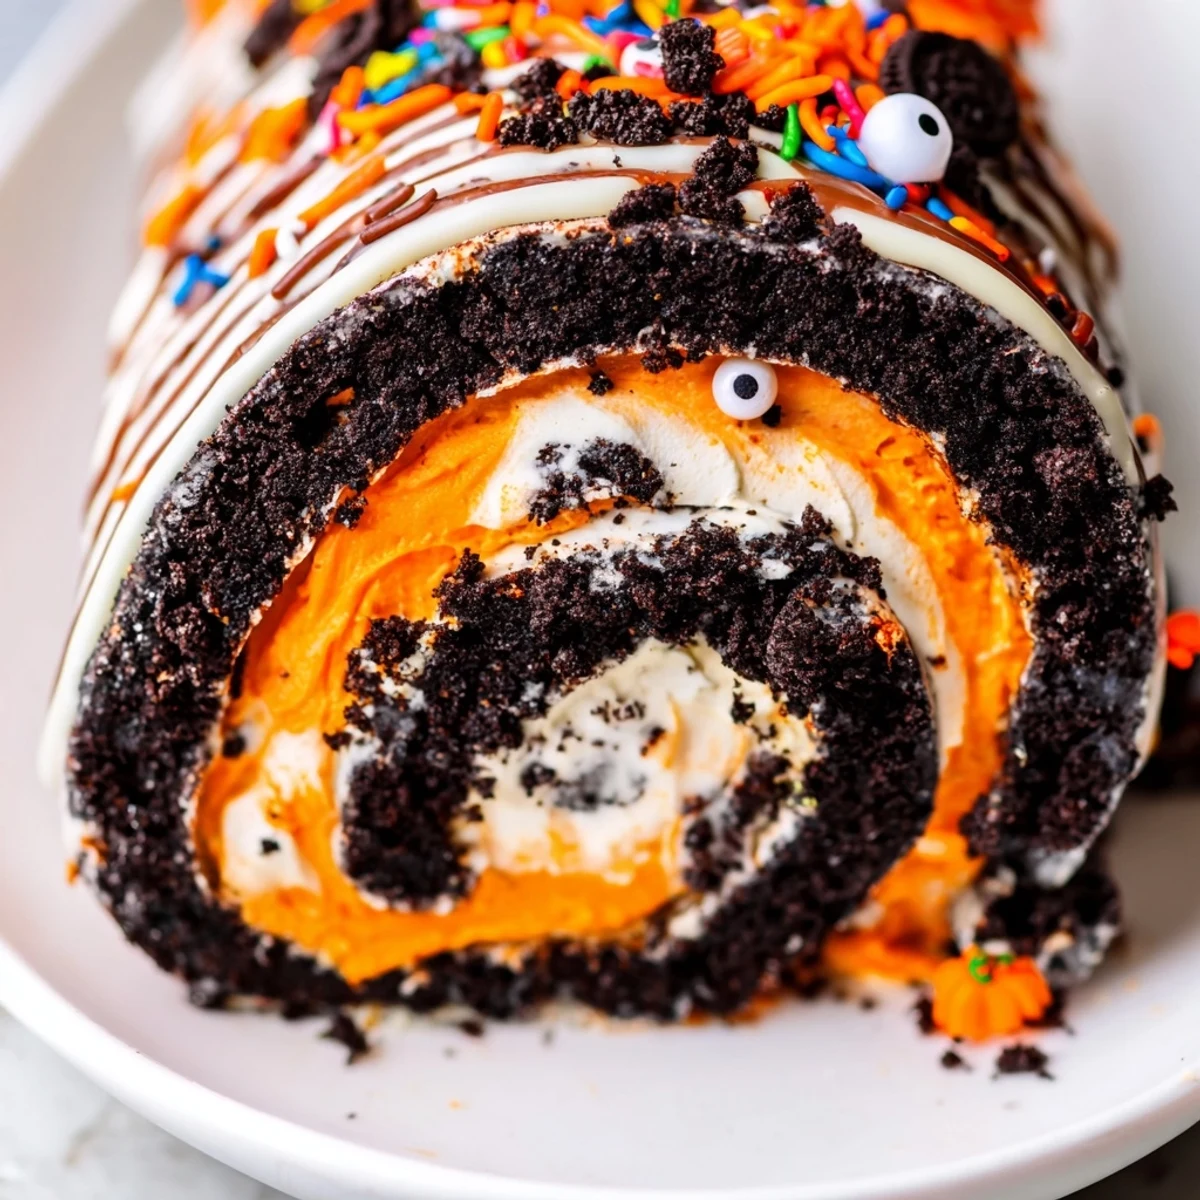
 Create a showstopping Halloween dessert with this creamy Oreo roll that requires zero baking. Crushed sandwich cookies form a rich chocolate base, while whipped cream infused with orange or purple food coloring adds festive flair. The entire log comes together in just 25 minutes of active prep time, then chills until firm. Top with Halloween sprinkles, candy eyes, and chocolate drizzle for maximum spookiness. Each slice delivers the perfect balance of crunchy chocolate cookies and silky whipped cream.
The kitchen counter was already covered in orange sprinkles when my daughter asked if we could make something spooky for her class party. I'd been eyeing those limited edition Halloween Oreos for weeks, and suddenly it clicked—a roll cake that needed zero oven time during the chaos of October. The first attempt looked like a lopsided pumpkin, but the kids didn't care. They just wanted seconds.
Last year I made three of these rolls back to back—one for a potluck, one for my office, and one that never actually made it out of the house. My husband walked in on me rolling the second one at midnight, surrounded by falling crumbs and empty Oreo packages. We ate the failed edges standing up, and honestly, those imperfect bites were the best part.
Ingredients
- 36 Halloween Oreos: The seasonal ones bring those orange centers and purple cream that make this extra festive, though regular Oreos work perfectly fine
- 1 cup powdered sugar: Sweetens the cookie base while helping it bind together into that perfect rollable texture
- 6 tbsp unsalted butter, melted: The glue that holds crushed cookies together—melt it completely so no pockets of butter remain
- 4 oz cream cheese, softened: Room temperature is non negotiable here or you will end up with lumps in your base
- 1 cup heavy whipping cream: Cold from the fridge whips up best and creates that cloudlike filling we want
- 1/4 cup powdered sugar: Just enough sweetness for the cream without overpowering the cookies
- 1 tsp vanilla extract: Pure vanilla makes everything taste more expensive and homemade
- Orange or purple food coloring: Gel coloring gives the most vibrant hues without adding liquid to your whipped cream
- Halloween themed sprinkles: The finishing touch that makes this feel like a celebration
- Candy eyes: Totally optional but absolutely necessary for maximum creepiness
- Melted chocolate: A quick drizzle takes this from homemade to bakery worthy
Instructions
- Prep your workspace:
- Line a large baking sheet or flat countertop with parchment paper—this is your rolling surface and the only thing standing between you and a sticky disaster
- Crush those cookies:
- Pulse the Oreos in a food processor until you have fine crumbs, then transfer to a large mixing bowl
- Make the dough:
- Add the powdered sugar, melted butter, and softened cream cheese to the crumbs and mix until everything comes together into a thick, sticky dough that holds its shape when squeezed
- Roll it out:
- Place the dough between two sheets of parchment paper and roll to about 1/2 inch thickness in a rough rectangle shape
- Whip the cream:
- In a chilled bowl, beat the heavy cream with powdered sugar and vanilla until stiff peaks form, then gently fold in food coloring until evenly tinted
- Spread the filling:
- Spread the colored whipped cream over your Oreo rectangle, leaving about an inch border along one long edge
- Roll it up:
- Use the parchment paper to help guide the roll, starting from the long edge with filling and rolling toward the border, then place seam side down
- Chill completely:
- Refrigerate for at least one hour—this step is crucial for clean slices and structural integrity
- Decorate and serve:
- Drizzle with melted chocolate, sprinkle with decorations, add candy eyes if using, then slice into 1 inch pieces with a sharp knife
 Pin it
 This recipe has become my go to contribution for every October gathering, mostly because it looks impressive but secretly took zero baking skills. Last Halloween, my neighbor asked for the recipe while taking her third slice, and I felt like a dessert genius who had tricked everyone into thinking I spent hours.
Making It Ahead
The entire roll can be assembled and chilled up to 24 hours before serving. Just wrap it tightly in plastic once it is firm and add decorations right before serving to keep everything crisp and vibrant. The flavors actually develop overnight, making it taste even better the next day.
Rolling Without Tears
If your Oreo base cracks while rolling, do not panic—press it gently back together and chill for 15 minutes before continuing. The parchment paper method is your best friend here, providing structure and preventing the roll from sticking to your surface.
Color And Decor Ideas
Beyond orange and purple, consider making stripes of color in your whipped cream for a tie dye effect that looks like a cauldron gone right. The decoration possibilities are endless and can match whatever Halloween vibe you are going for.
- Try crushing extra Oreos on top for added texture
- Candy corn makes surprisingly elegant garnishes when placed carefully
- Edible glitter transforms this into something magical
 Pin it
 This is the kind of recipe that makes people think you are fancier than you actually are, and I will never tell them otherwise.
Recipe FAQs
- → How long does the Oreo roll need to chill?
-
The roll requires at least 1 hour of refrigeration to firm up before slicing. For best results, you can chill it overnight—this makes it easier to cut clean slices and allows flavors to meld together beautifully.
- → Can I make this ahead of time?
-
Absolutely! This dessert actually benefits from being made a day in advance. The texture improves after chilling, and you can decorate it right before serving. Store it well-covered in the refrigerator for up to 3 days.
- → What if I can't find Halloween Oreos?
-
Regular Oreos work perfectly fine—simply add orange or purple food coloring to the whipped cream filling. You can also use food coloring in the cookie base mixture for an extra pop of color throughout.
- → Can I freeze this Oreo roll?
-
Yes, you can freeze the undecorated log for up to 1 month. Wrap it tightly in plastic wrap and foil, then thaw overnight in the refrigerator before adding decorations and serving.
- → How do I get clean slices without squishing the roll?
-
Use a sharp knife and wipe it clean between each slice. For even cleaner cuts, dip the knife in hot water and dry it before each slice. Chilling the roll thoroughly is key—soft filling will compress too easily.