 Pin it
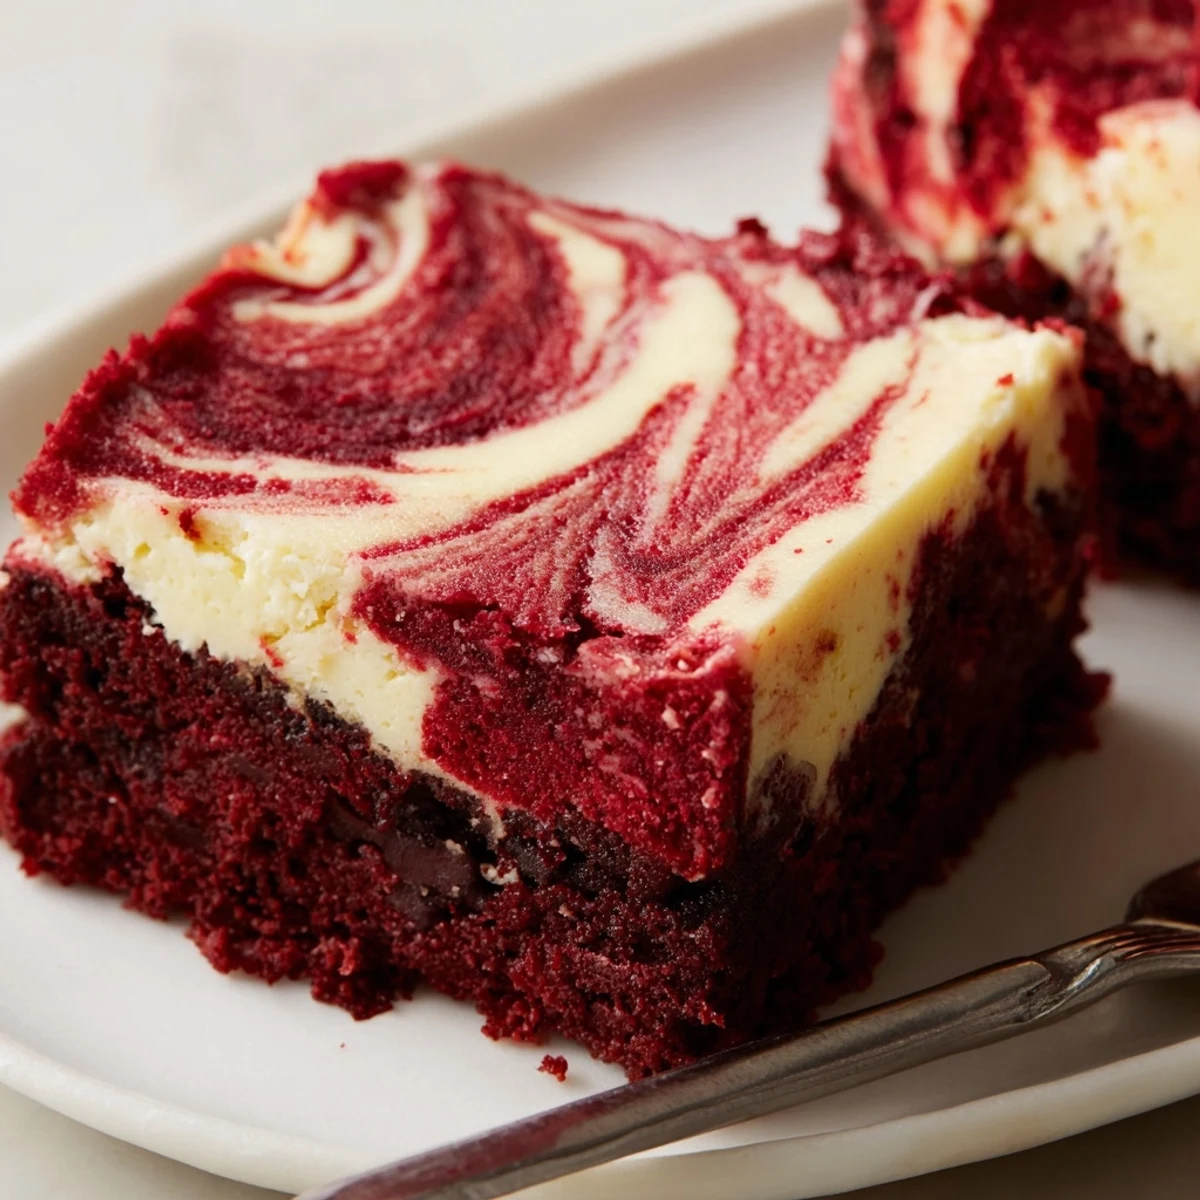
 Start by whisking melted butter and sugar, then add eggs, vanilla and red coloring to form a glossy batter. Fold in sifted flour, cocoa and salt, and press about three quarters into an 8-inch pan. Beat cream cheese with sugar, egg and vanilla until smooth, pour over, then dollop remaining batter and swirl for a marbled finish. Bake 33–37 minutes until the center is mostly set, cool fully, then chill at least 1 hour before slicing to firm the layers. For extra richness stir in chocolate chips under the cheesecake layer and use gel color for a deeper hue.
The first time I made these red velvet brownies with a cheesecake layer, I remember the kitchen filling with that unmistakable scent of cocoa and sugar, the air tinged with anticipation. Midway through swirling the batters together, I nearly laughed at how vibrant my hands got from the food coloring—a sign of good things to come. The contrast between the deep red and creamy white felt almost too pretty to eat. But of course, temptation always wins in my house.
The day I baked these for a friend's birthday, we ended up sneaking into the kitchen before the party to slice them and lick the knife clean—unabashed and gleeful. I still tease her that half the batch never even made it to the dessert table, but honestly, that's the kind of memory that sticks around.
Ingredients
- Unsalted butter: Melting this first gives that glossy, fudgy brownie base—room temperature butter also works but doesn't yield the same chew.
- Granulated sugar: Creaming it into the butter is key for that shiny crust on top—I've tried brown sugar but it changes the classic texture.
- Eggs: Adding them one at a time helps the batter come together smoothly and gives lift.
- Vanilla extract: Just a little enhances both layers—don't skip it, even if you think you could.
- Red food coloring: Liquid or gel, this is the showstopper—use enough to get that dramatic color.
- All-purpose flour: Sift it in for no lumps—I've learned a gentle fold keeps the brownies tender.
- Unsweetened cocoa powder: This is where the chocolate flavor pops without overpowering the tangy cheesecake.
- Salt: Just a pinch balances all that sweetness.
- Cream cheese: Softened first, it melts into lusciousness and makes swirling easy.
Instructions
- Ready the pan and oven:
- Line your baking pan with parchment, making sure there's enough overhang—later, you’ll thank yourself when they lift out perfectly. Preheat the oven to 175°C (350°F) and feel the anticipation build.
- Mix up the red velvet brownie base:
- Whisk together melted butter and sugar until it turns glossy and thick, then add eggs, vanilla, and that satisfying splash of food coloring. The batter looks so vibrant, it practically begs for a swirl.
- Fold in the dry ingredients:
- Sift in the flour, cocoa, and salt, then gently fold with a spatula—stop as soon as streaks disappear to keep the brownies tender. Scoop three-quarters of this vibrant red batter into your pan, setting aside the rest for the magic on top.
- Create the cheesecake layer:
- In a fresh bowl, blend softened cream cheese and sugar until dreamy, then beat in the egg and vanilla. Spread this pale, creamy mixture right over that bold red base, making sure it goes edge to edge.
- Marble and swirl:
- Dollop that reserved red velvet batter on top in little spoonfuls. Drag a knife or skewer through to create as many swirls as your heart desires.
- Bake to perfection:
- Slide the pan into the oven and wait about 35 minutes—your kitchen will smell amazing, and a toothpick should come out with just a few moist crumbs when it’s done. Resist peeking too often, or you’ll risk a sunken middle.
- Cool and set:
- Let the brownies cool thoroughly in the pan; they need that time to set up. Chill them in the fridge for at least an hour before slicing—they hold together beautifully when cold.
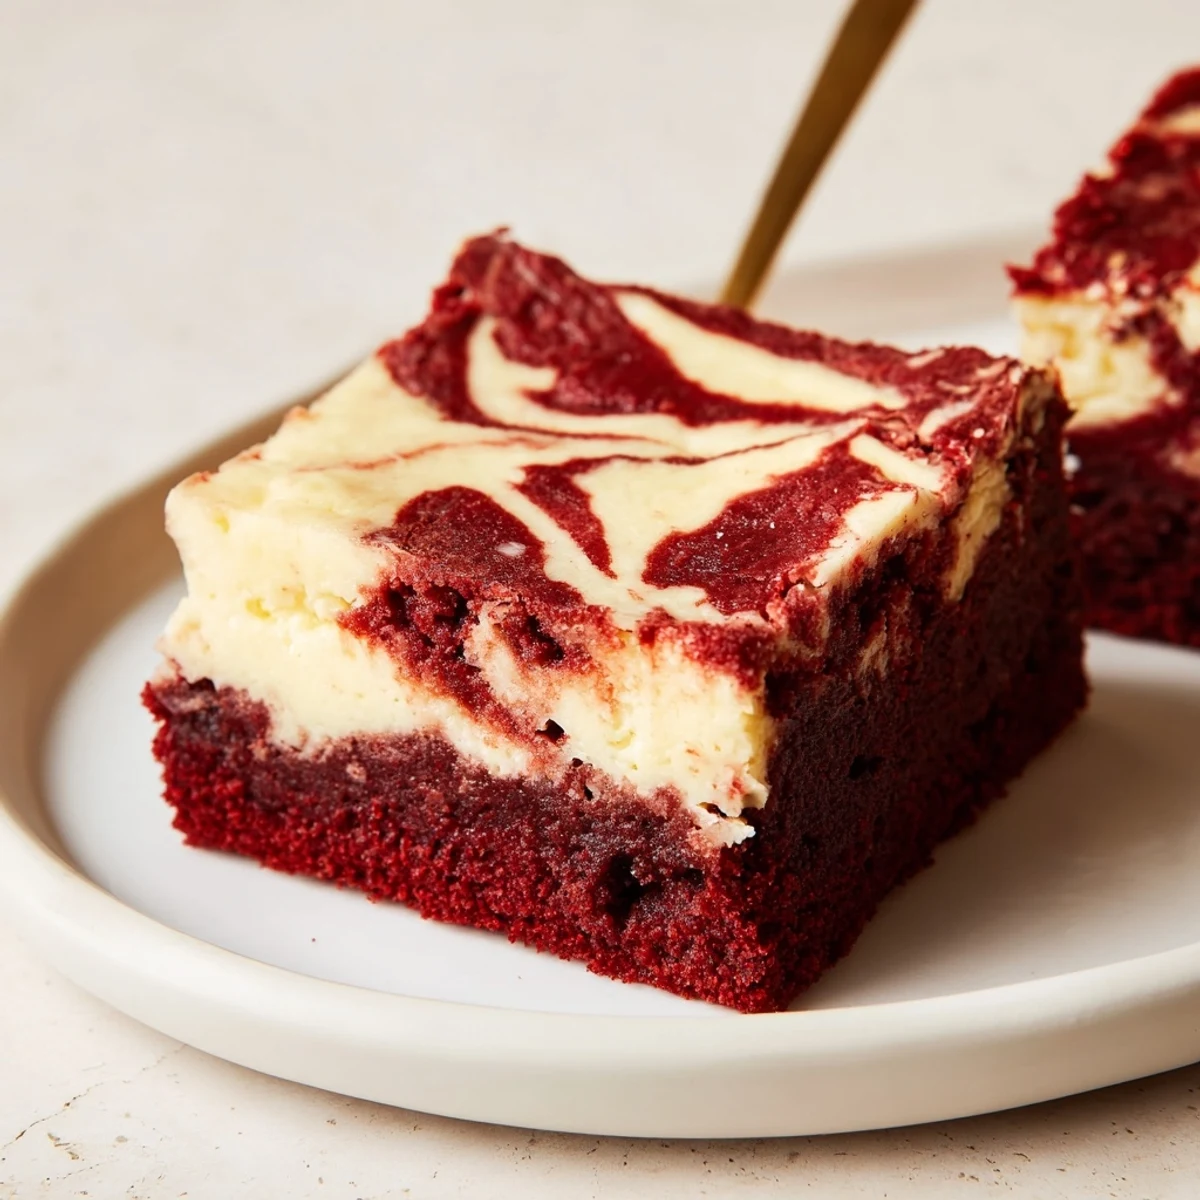
 Pin it
 There was one afternoon when I brought a batch to the park for a picnic, and by the time the sun set, the only evidence of them were a few red-tinged napkins and a chorus of happy sighs—proof that a simple tray of brownies can make a moment unforgettable.
Get the Best Swirl
I learned it's best to make the red velvet batter a little thicker than the cheesecake layer—it lets you pull your knife through without muddying the colors. If you swirl too much, you lose the bold, distinct patterns that make each piece look bakery-worthy.
Customizing for Every Occasion
For holiday flair, toss a handful of white chocolate chips or festive sprinkles into the batter on top before baking. If you want to serve these for a birthday, cut them into fun shapes with cookie cutters after they've completely chilled.
Serving and Storing Tips
Brownies taste best served chilled—overnight in the fridge means tidier slices and more intense flavor.
- Wrap leftovers tightly to keep them from drying out.
- Let them come to room temperature for an even softer bite.
- Don’t forget a dusting of powdered sugar or a handful of berries for extra color.
 Pin it
 Red velvet brownies with cheesecake have a way of making any day brighter. I hope they bring you as much delight as they've brought to my kitchen table.
Recipe FAQs
- → How do I achieve a fudgy brownie texture?
-
Use melted butter and avoid overmixing once the flour is added. Bake just until the center is mostly set; a few moist crumbs on a toothpick ensure a dense, fudgy crumb.
- → Why swirl the cheesecake layer gently?
-
Gentle swirling creates a marbled look without fully blending the layers. Use a knife or skewer and sweep shallow arcs to keep distinct red and cream ribbons.
- → How can I prevent the cheesecake from cracking or sinking?
-
Beat the cream cheese until smooth and avoid overbeating after adding the egg. Bake until the center is just set and cool gradually; chilling helps the filling firm without cracks.
- → Can I substitute ingredients for dietary needs?
-
For a lower-fat option use reduced-fat cream cheese, though texture will be softer. Gluten-free flour blends can replace all-purpose flour—expect slightly different crumb and bake time.
- → How should leftovers be stored?
-
Cover and refrigerate for up to 3–4 days. Chilled slices hold their shape best and can be brought to near-room temperature before serving for a softer mouthfeel.
- → Any tips for deeper red color without altering texture?
-
Use concentrated gel food coloring a little at a time; it imparts vibrant color with minimal added liquid. Cocoa powder balance helps keep the chocolate flavor without dulling the hue.