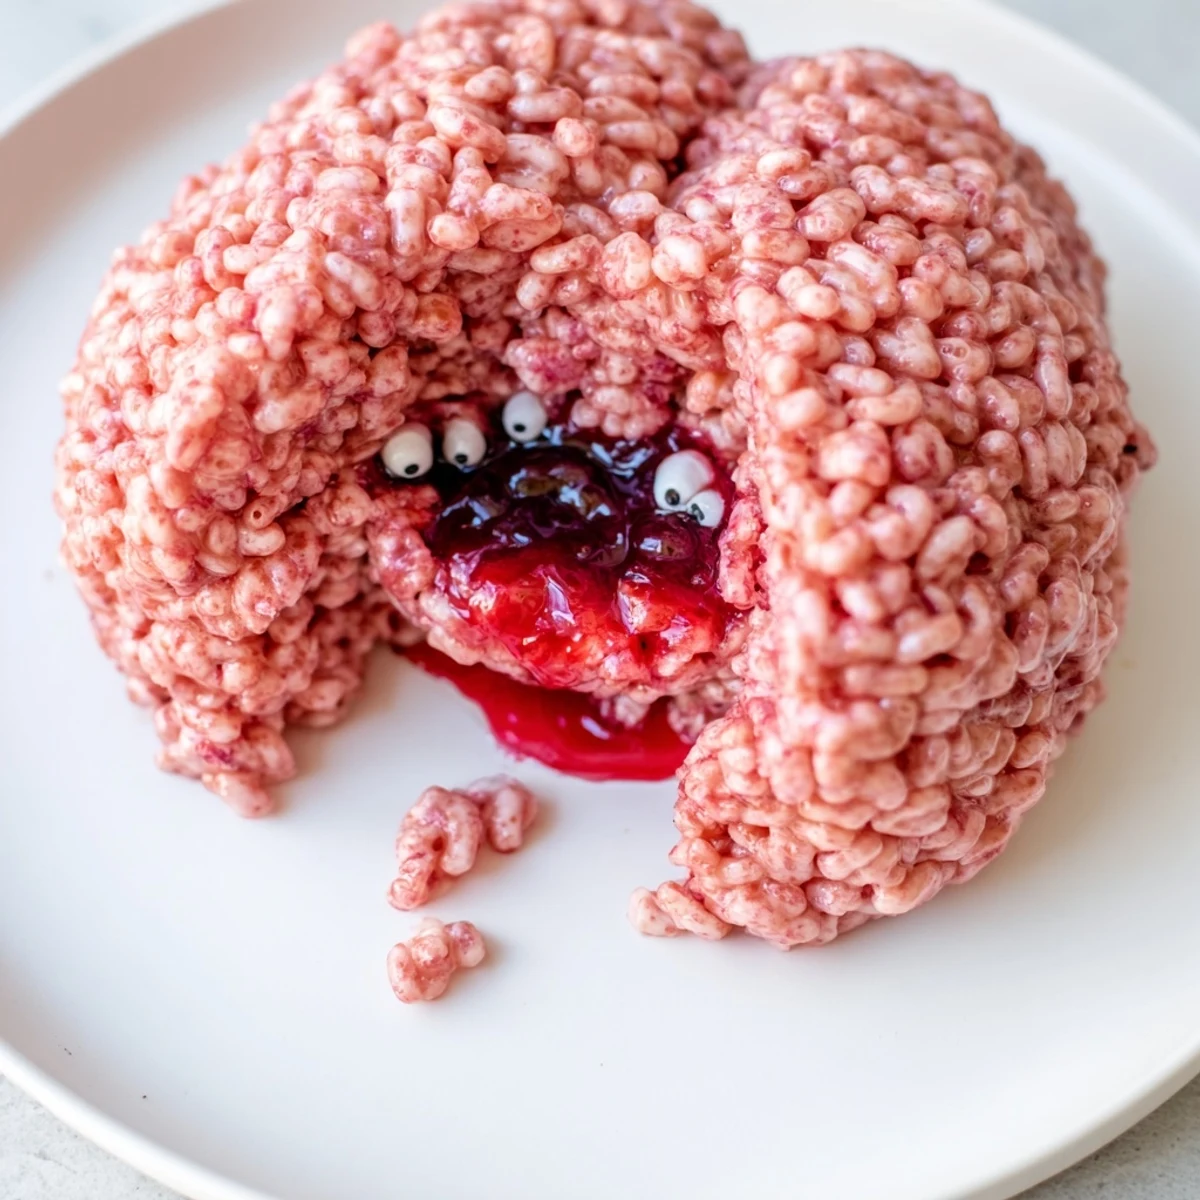
 Pin it
 This spooky Halloween dessert transforms classic crispy rice treats into an eerie brain-shaped centerpiece. The sweet, crunchy cereal exterior gets a pinkish-red hue to mimic brain tissue, while a hidden cavity holds raspberry or strawberry jam that dramatically oozes out when sliced. Ready in just 40 minutes, this vegetarian dessert serves eight and offers the perfect balance of textures—crispy, chewy marshmallow coating giving way to smooth, tart berry filling. Ideal for Halloween parties, haunted house gatherings, or any event calling for delightfully gruesome sweets that taste as good as they look.
The year my daughter decided Halloween needed to be more than just pumpkins and plastic skeletons, I found myself staring at a mixing bowl wondering if pink marshmallow brain was actually a good idea. Her eyes lit up when I suggested we make something that would gross out her friends while secretly being delicious. That afternoon we accidentally created the most legendary party favor her elementary school had ever seen, and I've been tweaking the recipe ever since.
Last October I made three of these brains for my office potluck, and I swear people were taking photos before anyone even touched a knife. My coworker's seven-year-old solemnly declared it the best thing he'd ever eaten, then immediately asked if we could make a heart version for Valentine's Day. There's something about combining childhood treats with slightly morbid presentation that just works at any age.
Ingredients
- 6 cups crispy rice cereal: The foundation of your brain structure, so use fresh cereal for maximum crunch
- 3 tablespoons unsalted butter: Salted butter works too but unsalted gives you better control over the final flavor
- 1 (10 oz) bag mini marshmallows: Regular sized marshmallows take forever to melt, so stick with minis for smooth, even melting
- Red or pink food coloring: Gel coloring yields more realistic brain tones than liquid drops
- ½ cup raspberry or strawberry jam: Seedless jam creates the most convincing ooze effect
- 2 tablespoons seedless raspberry or strawberry coulis: This optional addition makes the filling extra dramatic and flowy
Instructions
- Prepare your brain mold:
- Line a medium bowl with plastic wrap, pushing it into all the curves and crevices so nothing sticks later. If you have an actual brain mold, even better, but a regular bowl works perfectly fine.
- Melt the marshmallow base:
- Melt butter in a large saucepan over medium heat, then add marshmallows and stir constantly until completely smooth and melted. This takes about 3 to 5 minutes, and patience here prevents tough, rubbery treats.
- Add the creepy color:
- Drop in food coloring one drop at a time, mixing thoroughly between additions until you reach a slightly unnerving fleshy pink or pale brain red. Remember, a little goes a long way with gel coloring.
- Combine with cereal:
- Pour in your crispy rice cereal and fold gently until every piece is coated in the pink marshmallow mixture. Let it cool for just a couple minutes so it's not scorching hot to work with.
- Form the brain cavity:
- Press half your cereal mixture into your prepared mold, using buttered hands to push it up the sides and create a hollow center. Work quickly but gently so you don't compact it too tightly.
- Add the bloody filling:
- Spoon your jam and optional coulis into the center cavity, keeping it away from the edges so it doesn't leak through. The more filling you add, the more dramatic the oozing effect when sliced.
- Seal and shape:
- Top with the remaining cereal mixture and press gently to seal the filling completely inside. Use your hands to sculpt subtle ridges and valleys that resemble brain convolutions.
- Set and detail:
- Let your brain rest at room temperature for 20 to 30 minutes until firm enough to unmold without losing shape. For extra realism, use a small brush and additional food coloring to paint in darker crevices and highlight the ridges.
- The grand reveal:
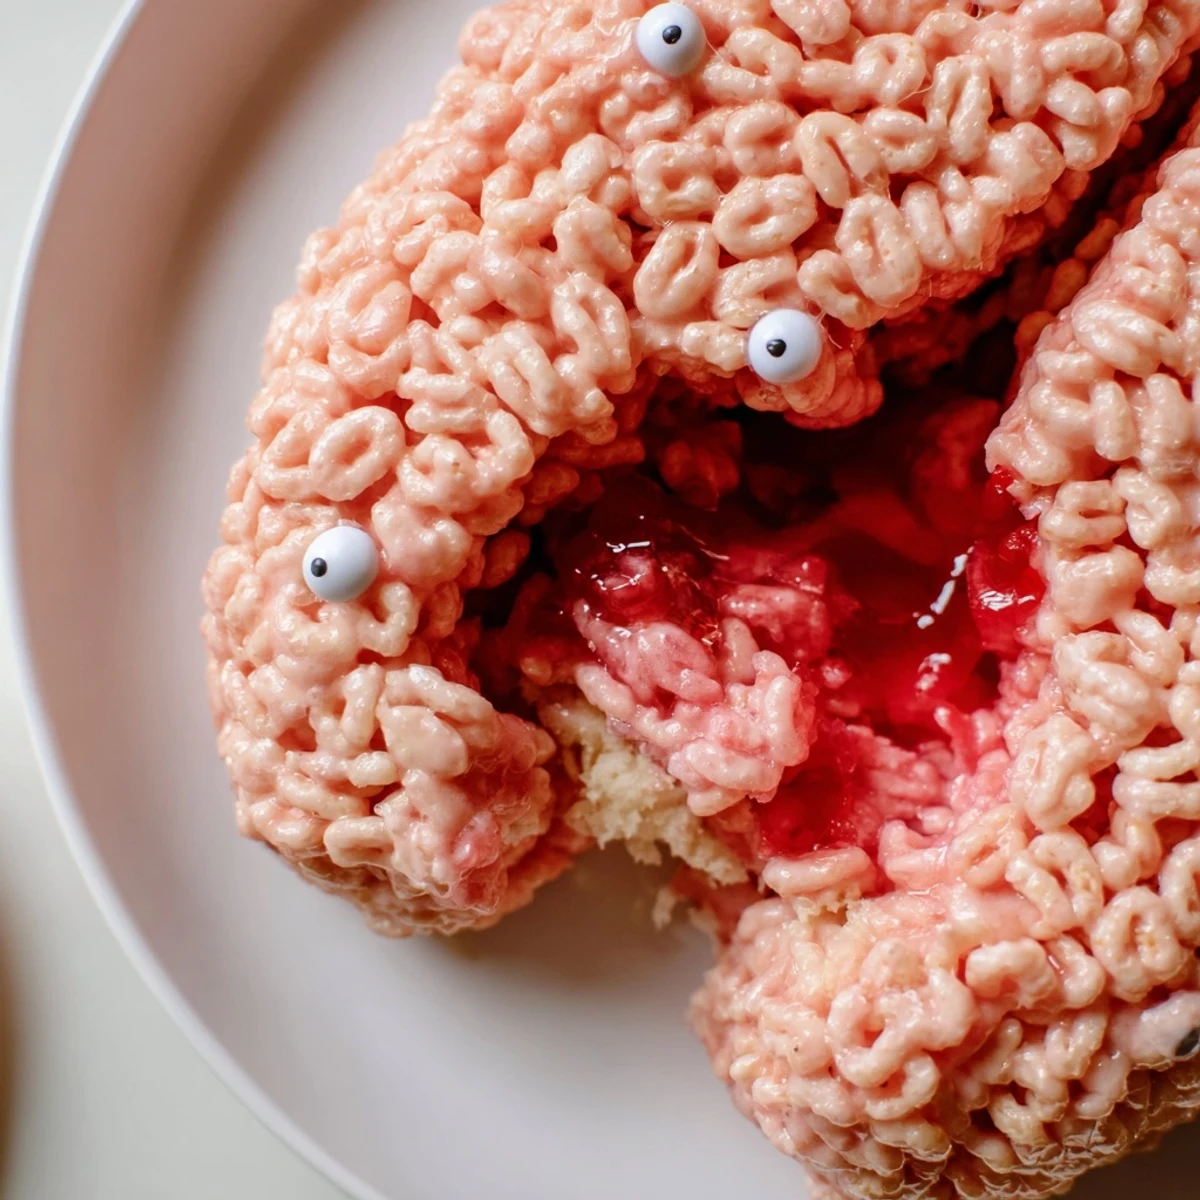
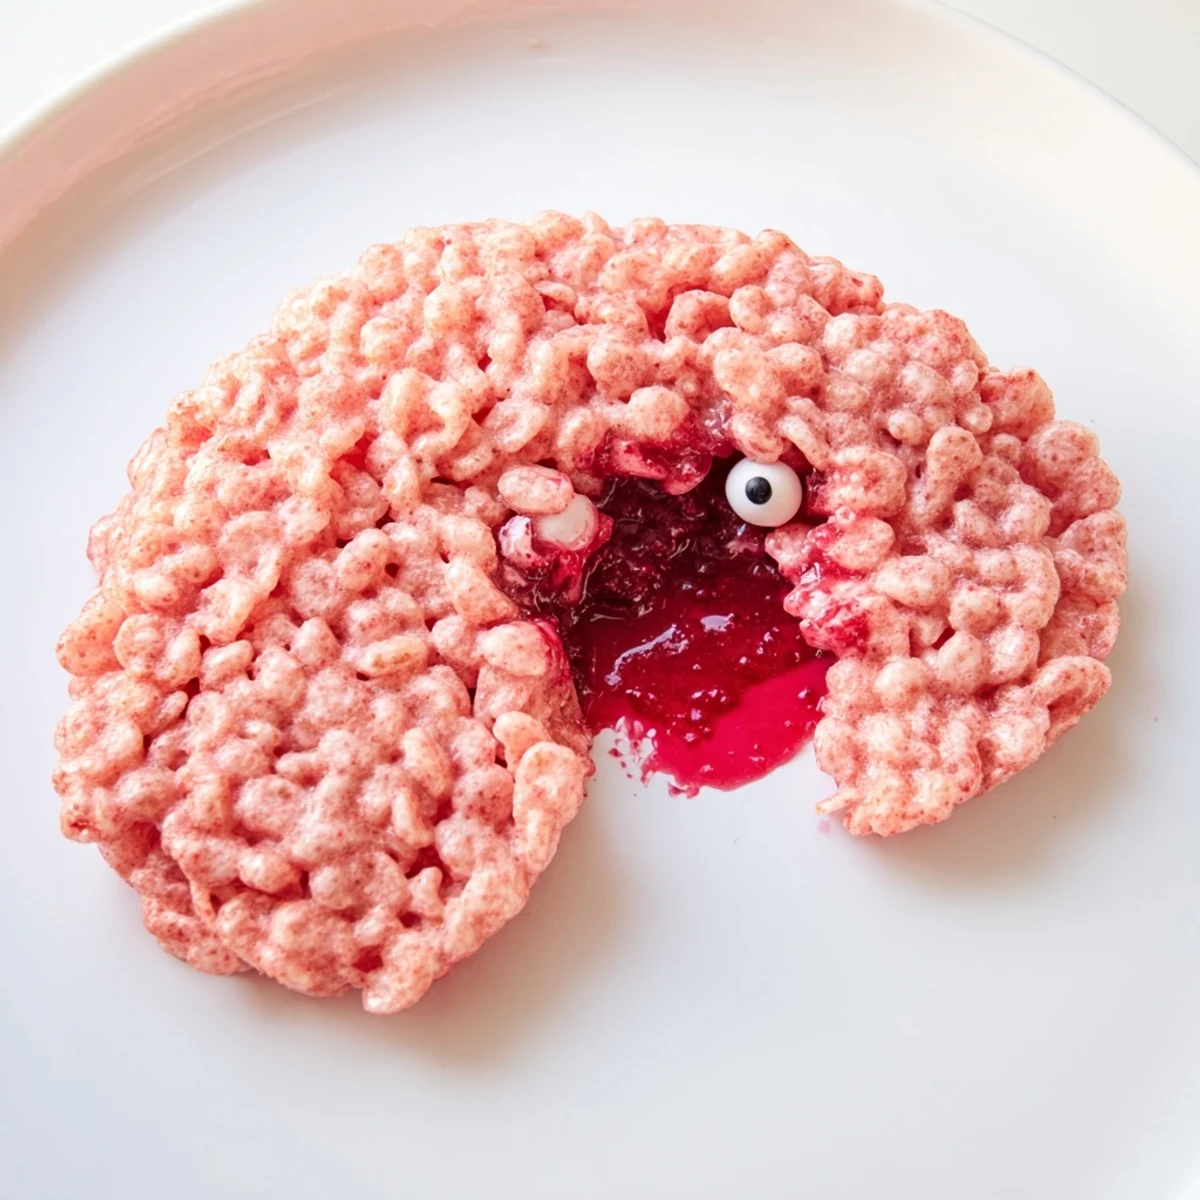
- Carefully unmold onto a serving plate and position it at an angle that shows off your brain's best features. Add candy eyes if you're going for maximum creep factor.
 Pin it
 The first time I served this at a Halloween party, a grown man actually jumped back when I made the first cut. That red berry filling oozing out was so convincing that someone asked if I'd used real food coloring or actual blood, which I took as a compliment to my artistry. Now it's the one recipe people actually request year after year.
Making It Realistically Gross
The secret to brain texture is all in those surface ridges and how uneven they look. Once your brain is unmolded, use the back of a spoon or your fingers to gently press and squish the surface until it looks convincingly organic rather than perfectly smooth. The more asymmetrical and textured it appears, the better the reaction when you bring it to the table.
Flavor Variations
Raspberry and strawberry are classic for the blood effect, but cherry preserves create an even darker, more dramatic filling that photographs incredibly well. For a completely different twist, try mixing some crushed vanilla wafers into the cereal mixture for a cookies and cream brain with chocolate ganache filling. The gross out factor works with any flavor combination.
Serving And Storage
These brains are best served the same day they're made while the outside still has that perfect crispy texture. If you need to make them ahead, wait to add any detailed food coloring painting until just before serving, otherwise the colors might bleed into the cereal mixture.
- Let the brain sit at room temperature for at least 15 minutes before slicing so the filling has time to settle
- Use a sharp knife dipped in hot water to make clean cuts through the sticky marshmallow
- Store any leftovers loosely covered with plastic wrap, never airtight, or you'll lose the crispy texture
 Pin it
 There's something deeply satisfying about serving food that makes people simultaneously horrified and delighted. This brain manages to be both the grossest and most delicious thing at any Halloween gathering, and that's exactly why it works so perfectly.
Recipe FAQs
- → How far ahead can I make these brain treats?
-
Prepare these crispy rice brains up to 24 hours before your event. Store covered at room temperature to maintain texture. The filling stays secure inside, and the exterior remains pleasantly crispy.
- → Can I use different fillings besides berry jam?
-
Absolutely. Cherry preserves create darker oozing, while strawberry offers classic sweetness. For nutty variations, try chocolate hazelnut spread or peanut butter for a richer filling that still creates dramatic effects when sliced.
- → What's the best way to achieve realistic brain coloring?
-
Gel food coloring provides more intense, realistic hues than liquid versions. Start with pink, adding red drop by drop until reaching desired brain-like tone. The mixture should look somewhat organic rather than perfectly uniform for authentic appearance.
- → Do I need a special brain-shaped mold?
-
No specialized mold required. Line a medium bowl with plastic wrap, pressing the cereal mixture up the sides to create a hollow cavity. The natural curves of round bowls produce convincing brain hemisphere shapes when unmolded onto serving plates.
- → How do I prevent the filling from leaking during assembly?
-
Ensure the cereal mixture cools slightly but remains workable before shaping. Press firmly to seal seams where top and bottom halves meet. Let the assembled brain set at room temperature for 20-30 minutes before unmolding—this allows the marshmallow to firm and hold everything securely.
- → Can these be made gluten-free?
-
Yes. Simply use certified gluten-free crispy rice cereal and verify that your marshmallows are gluten-free. Most major brands offer gluten-free options, making this treat accessible for guests with dietary restrictions while maintaining the same spooky appeal.